
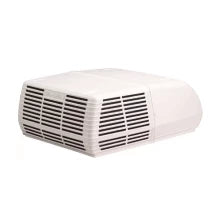
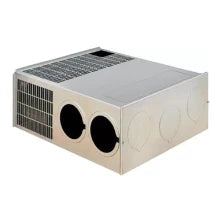
The beauty of owning an RV is that it offers the freedom to explore without forfeiting the comforts of home, chief among them being air conditioning. However, you’re not going to have as good of a time if any of those comforts malfunction. Most specifically, things are going to get much warmer in your camper when you’re facing issues with your RV’s AC.
Fortunately, not all RV AC problems require professional attention. Here are five common RV air conditioner repairs you can do yourself, ensuring your travels remain comfortable regardless of the temperature outside.
1. Clogged Air Filters
Issue: Airflow seems weaker than usual, and the air isn’t as cool.
DIY Repair:
- Step 1: Turn off and unplug your RV’s air conditioner.
- Step 2: Locate the air filter. The exact position can vary by model, so consult your AC unit’s manual.
- Step 3: Remove the filter. Replace it with a new one if it’s disposable. Otherwise, clean it with mild detergent and lukewarm water, then allow it to dry completely before reinstalling.
Outcome: Clean or new filters provide better airflow and reduce stress on your AC system, improving its efficiency and lifespan.
2. Frozen Evaporator Coils
Issue: The AC unit is running perfectly fine but not cooling the RV effectively.
DIY Repair:
- Step 1: Inspect the unit’s interior to determine whether the evaporator coil is frozen. You’ll likely need to remove a panel to do this.
- Step 2: Turn off the unit and allow the ice to melt completely if it’s frozen. This step can take several hours.
- Step 3: Once thawed, check the filters and airflow to prevent future freezes.
Outcome: Melting the ice restores normal air conditioning function by allowing the refrigerant to flow as designed.
3. Leaking Refrigerant
Issue: Similar to the previous issue, the air conditioner isn’t cooling the space effectively, even with proper airflow.
DIY Repair:
- Step 1: Locate the refrigerant lines. Look for signs of leakage, such as oil residue.
- Step 2: You can use a refrigerant kit to patch minor leaks should you find one. Follow the kit’s instructions carefully.
- Step 3: Recharge the refrigerant. This step requires precision and adherence to your AC unit’s specifications, so review your unit’s manual thoroughly before proceeding.
Note: Handling refrigerant fluids involves environmental and safety concerns. While you can sometimes patch minor leaks, more significant issues require professional attention.
Outcome: Sealing leaks and recharging the system can restore cooling efficiency. However, seek professional help to avoid further damage or environmental harm if you’re uncertain.
4. Faulty Capacitors
Issue: The AC unit struggles to start or shuts off unexpectedly.
DIY Repair:
- Step 1: Discharge the capacitor by shorting its terminals with an insulated screwdriver. This is crucial to prevent shock.
- Step 2: Test the capacitor with a multimeter set to the capacitance setting. It needs replacing if the reading is far from the capacitor’s rated capacitance.
- Step 3: Replace the faulty capacitor, ensuring the replacement matches the original’s specifications.
Outcome: Replacing a faulty capacitor restores power and efficiency to the AC unit, ensuring reliable operation.
5. Broken Fan Motor
Issue: The AC unit is on, but the fan isn’t spinning.
DIY Repair:
- Step 1: Verify that power is reaching the motor. Use a multimeter to check for voltage at the motor’s wiring.
- Step 2: You may need to replace the motor if power is reaching it but it still won’t run.
- Step 3: Consider taking detailed pictures and labeling each wire and connection before removing the faulty motor as you’ll need to install the new motor and reconnect the wires as they were.
Outcome: A functioning fan motor is crucial for effective air distribution. Replacing a broken motor can significantly improve your AC unit’s performance.
Tools You’ll Need

While your repair process will vary quite a bit depending on the issue and RV AC unit brand you’re working on, there’s a set list of tools that you should always have on hand. Make sure you grab the following items to ensure you’re ready for anything:
- Screwdrivers: Have various sizes to fit different screws you may encounter.
- Pliers: These are perfect for handling wires and prying open panels on your AC unit with ease.
- Multimeter: Used for measuring voltage, current, and resistance, which is essential for diagnosing electrical issues.
- Safety goggles: Ideal for protecting your eyes from any potential harm, such as flying debris or sparks.
- Flashlight: This might be useful for seeing inside dark corners of your AC unit while working on it.
Safety Precautions
Safety should always be the top priority when engaging in DIY repairs. It is crucial to ensure a safe repair process by following these steps:
- Always make sure to turn off the power to the unit before starting any repair work. This critical step prevents electrical accidents. Insulated tools are crucial as they will protect you from potential electric shock when working with electrical components even with the power off.
- Wearing the right safety gear is non-negotiable to safeguard yourself from sharp objects and hazardous substances or debris. Furthermore, it’s imperative to thoroughly read and follow all the instructions and safety warnings in your AC unit’s manual. These guidelines help you perform the repairs safely and effectively. Ignoring them can result in unit damage or personal injury.
Taking these precautions can significantly reduce the risk of accidents and ensure a safer DIY repair experience.
What To Do if It’s Beyond Your Repair

While handling common RV air conditioner repairs yourself is typically the ideal choice, there comes a time when you have to admit that an issue with your system may prove too complex or fraught with risk to attempt it yourself. It’s advisable to reach out to a professional RV AC repair service when faced with such situations. These experts have a wealth of experience and specialized tools to precisely diagnose the root cause of the problem. Once identified, they can undertake the necessary repairs with a level of efficiency and accuracy that will restore your air conditioning system to its optimal operating condition, safeguarding against future breakdowns and ensuring your comfort.
However, there will be times in which your unit is too far gone, even with a professional touch. Investing in a new air conditioner might be the most sensible course of action, whether your unit’s reached the end of its service life or the cost of repairs seems unjustifiably high. This approach sidesteps the immediate repair costs and can offer long-term savings through improved energy efficiency and reliability. United RV Center is here to help if you decide to purchase a new AC unit. Simply find a replacement AC for RVs that works for you, and we’ll ship it out to you as soon as possible.


Comments (0)
There are no comments for this article. Be the first one to leave a message!