
Owning an RV opens up a world of adventure, but it also brings with it the responsibility of maintaining various onboard systems to ensure a comfortable journey. One such crucial system is the electric water heater. While these systems have a good reputation for working as intended, problems do pop up that can make your RV experience quite the pain. Fortunately, with the assistance of this comprehensive guide, you’ll be able to troubleshoot your RV’s electric water heater problems with ease.
Learning the Basics of RV Water Heaters
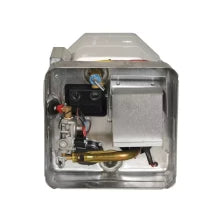
Electric water heaters in RVs provide hot water efficiently while you’re out exploring the world around you. They typically consist of a heating element, a thermostat, and a tank. The heating element warms the water inside the tank while the thermostat reads and controls the temperature. Some models may also have an anode rod to prevent tank corrosion. Regardless of its contents, these heaters are essential for providing hot water for showers, dishwashing, and other routine activities, making them a key component of your RV’s comfort and functionality.
While this info might feel unimportant, understanding the basics of how your RV’s electric water heater operates can aid in identifying problems more quickly and accurately. Knowing these primary components and their functions will provide you with a foundation for effective troubleshooting when things go wrong.

Common Issues and Troubleshooting Steps
Now that you’re familiar with the basics, it’s time to learn about what kinds of issues your RV electric water heater may encounter. Of course, you’ll also want to know how to troubleshoot these RV electric water heater problems on your own. That’s why this section contains detailed explanations for the most common problems and practical steps for fixing them.
Power Issues
One of the first things to check if your water heater isn’t working is the power supply. Ensure the RV connects properly to a power source; a loose connection is something you can easily fix. If the cables look good, it could also just be that you accidentally turned it off, so check the water heater’s power switch and ensure it’s in the “on” position.
If the switch is on but the water heater is still not functioning, you may need to verify the fuse associated with the water heater. Locate the fuse box, identify the specific fuse for the water heater, and check if it is blown. Replace the fuse if necessary and test the water heater again. If that doesn’t fix anything, you might want to test the power outlet itself with a multimeter to ensure that it is providing the correct voltage.
Cold Water Issues
When an RV water heater doesn’t turn on, most of the potential issues are easy to diagnose and fix. This isn’t the case if the system is on but not churning out warm water. Cold water issues can stem from multiple sources. First, verify that the bypass valve is not open, as this would prevent hot water from reaching your taps. The bypass valve is necessary for winterizing the RV and should remain closed during regular use.
Next, check for any leaks in the plumbing system that could mix the cold water with hot water. Inspect all visible pipes and connections for signs of water leakage or moisture. If no leaks are present, the problem may lie with a faulty thermostat or heating element that isn’t maintaining the desired temperature. You can test the thermostat with a multimeter to ensure it functions correctly. If the thermostat is working but the issue persists, the heating element may not be maintaining the heat, necessitating further diagnostic tests and possibly a replacement.
Additionally, ensure that the water heater’s anode rod is in good condition, as a deteriorated anode rod can affect heating efficiency and cause other issues in the tank. If none of these are the source of the issue or you don’t have the ability to fix it on your own, have a professional look at your system.
Upgrading Your RV Electric Water Heater
If the pros can’t even fix the problem, the best solution might be to look into an upgrade. Upgrading your RV’s electric water heater can offer numerous benefits, including improved efficiency, faster heating times, and enhanced features such as digital controls or energy-saving modes.
When considering an upgrade, evaluate the size and capacity of the new water heater. Ensure it fits in the existing space and meets your current hot water needs. Buying a model that exceeds your current needs is never a bad idea, as you may decide to upgrade other parts of your RV in the future. Either way, look for models that offer better energy efficiency and durability. Advanced features such as remote monitoring and control can also provide greater convenience and peace of mind.
Consulting with a qualified RV parts company can help ensure that you choose the right model for your RV. That’s why you should come to United RV Center. We have a large selection of camper water heaters to choose from, and we’ll make sure the one you choose will be the right fit for your RV. Regardless of the type you buy, an upgraded water heater can significantly enhance your RV experience by providing reliable hot water on demand.

Maintenance Tips for Preventing Future Problems
Whether you found a way to fix your current RV water heater or decided to buy a new one, regular maintenance is key to preventing future issues. For starters, one of the simplest yet most effective maintenance tasks is to drain and flush the tank periodically. This process helps remove any sediment you might have built up over the years, which can reduce efficiency and cause damage over time.
Inspecting the anode rod is another important maintenance task. The anode rod protects the tank from corrosion by attracting corrosive elements in the water. Over time, it’ll wear out and need replacement. Checking the anode rod annually and replacing it when necessary can prevent tank corrosion and extend the life of your water heater.
Ensuring proper ventilation around the water heater is also crucial. Adequate ventilation prevents overheating and allows the heater to operate efficiently. Regularly cleaning the area around the heater and ensuring that nothing obstructs the vents can help maintain optimal performance.
It’s also worth noting that monitoring the thermostat settings and adjusting them as needed can ensure the water heater operates within safe temperature ranges. Excessively high temperatures can cause scalding and increase the risk of damage to the heater, while excessively low temperatures may not provide sufficient hot water.
Lastly, regularly inspecting all plumbing connections and fittings for signs of wear or leaks can help catch and address potential issues before they become major problems. Tightening loose connections and replacing damaged fittings can prevent leaks and ensure efficient water heater operation.


Comments (0)
There are no comments for this article. Be the first one to leave a message!